Projects
Welcome to the Projects user guide. This feature is a powerful project management tool designed to enhance team collaboration and streamline project governance. Projects consolidate risks, issues, lessons, and tasks into a single interface, providing a central hub for all aspects of a project, making it easy for teams to stay organised and aligned.
Both the project management and tasks features integrate seamlessly with a built-in Gantt Chart, which helps you plan project timelines and identify key milestones. They also offer the ability for a team to estimate and log time and cost. Projects also integrates with the Governance Dashboard, allowing teams to generate insights and make informed decisions based on real-time data.
Access to Projects is included as part of the Governance licence. For further information contact [email protected].
Accessing projects
Upon purchasing Governance and its associated features, all users have default access to the Projects feature. Your 9ine Platform administrator(s) have the option to remove access via User Management, available to administrators in the header.
User Permission
Granting individual users access to this module does not automatically provide ac

Granting individual users access, does not automatically provide access to all moduleName within your organisation, but it allows users to create a new one. You can only view items to which you are assigned or have permissions.
A moduleName permissions include:
- Owner
- Member
- Notified user
- Attachment reviewer
There can only be a single owner but there are no limits to the number of members or notified users. Each attachment can also have one reviewer. Owners can edit and delete their assigned items, while all other roles have edit rights but cannot delete. When more than two members or notified users are added, the additional user details are combined into a single pill, which can be clicked to view further details. These pills are alphabetically ordered.
Info:
- A user cannot be assigned both the roles of owner and member but there are no restrictions on the notified users field.
- Owner fields are mandatory throughout the 9ine Platform.
- If a user's account has been disabled and they held the role of owner, you will be prompted to reassign upon next edit and prior to clicking Save.
In addition, if a project is part of a project group, the project group’s owner, members, notified users, and attachment reviewers are automatically granted edit and delete privileges to the project, as the project inherits project group permissions by default. These users are not displayed in the project log or in the project popup.
Tip:
It is possible to create a project that does not belong to a project group, referred to in the 9ine Platform as a standalone project.
Warning:
- A project’s owner, members, notified users, and attachment reviewers are automatically granted access to associated risks, issues, lessons, and tasks.
- As a project is considered a parent in the permission hierarchy, its roles take precedence over those assigned to the individual items. When child risks, issues, lessons, and tasks are created under a project, the project roles automatically inherit edit and delete permissions to all associated items.
- Project permissions are not displayed on individual risks, issues, lessons, and tasks. To view the permissions for a project, navigate to the projects log.
- If a user is assigned the role of project owner and their account is deleted via User Management by your account administrator(s), the administrator will be prompted to reassign any projects that are not marked as Closed (not started, in progress, on hold, or quality assurance).
Adding and removing notified users
Mention User (@)
To add a notified user, use the mention function in either the description field ...
To add a notified user, use the mention function in either the description field on the Details tab or the notes field on the Notes tab.
- To begin, click the @ symbol on your keyboard and type the first name of the user you wish to mention.
- A user can be mentioned at the start, in the middle, or at the end of the entered text.
- To remove a user as a notified user, simply delete their name from the relevant note.
- Mentioning a user sends an in-Platform notification and an email unless the user has disabled email notifications.
- The email notification sends a complete copy of the text entered by the user in the 9ine Platform, to the user’s registered email address.
Step 1:

Step 2:

Creating and editing projects including the details tab
Begin by clicking New Project, to get started. You will then be presented with eight tabs, including:
- Details
- Checklist
- Scheduling
- Time Management
- Cost
- Notes
- Attachments
- Custom Data

The first tab allows you to capture and view key details associated with the project, including the title, number, description, project group, owner, members, notified users, priority and status.
Tip:
This tab has two mandatory fields: Title and Owner. These are the only mandatory fields required for creating a new project.
Number field
The “Number” field helps order moduleName sequentially in the log. You can enter ...
The Number field helps order items sequentially in the log. You can enter up to five-digit numbers, including decimals. The sequence number is visible to all users within the organisation and is not user-specific.
Warning:
Text values are not permitted in this field.
Description Tab
The ...
The Description field offers additional formatting functionality. The formatting applied in the rich text editor is retained and displayed on the moduleName log when clicking the Description icon.


If a description has not been added, the field appears as grey and disabled on the moduleName log.
Selecting a project group for a project is optional as a project can be designated as standalone. If a project group is selected, it's name will appear on the project group column on the projects log. If this field is left empty and the project remains standalone, the log will display a -.
Tip:
It is possible to move a project to a different project group by clicking Edit Project and selecting your preferred project group title.
A project can be assigned one of five priority levels: critical, high, medium, low, and very low. When you select one of these priority options, or if a project is left with a No Priority status, specific colours are assigned to represent each priority in the projects log:

Similarly, a project has five status options, including: not started, in progress, on hold, quality assurance, and closed. When marking a project’s status as Closed, it is automatically removed from the project log.

Utilising the checklist and custom data tabs
The Checklist and Custom Data tabs are identical in functionality.
Checklist Tab
To add an item in the respective tab, enter text in the field and click ...

To add an item in the respective tab, enter text in the field and click Add.
- The checklist tab accepts alphanumeric values and has no text limit.
- Duplicate entries are not permitted.
- When you enter more than one entry, you have the option to reorder them by dragging and dropping the items into your preferred sequence.
- Individual items can be marked as closed, with the option to undo this action at any time by unchecking the item.
- To mark an individual item as closed, you can either click the checkbox or the text. When an item is marked as closed, the text will be struck through. To uncheck an item, repeat this process.
You also have the option to edit and delete individual items.
Scheduling a project
Scheduling Tab
The scheduling tab offers four fields: year, start date, due date, and term and s...
The scheduling tab offers four fields: year, start date, due date, and term and semester.

Date field
When selecting a date, you can manually type in the specified format or click on
When selecting a date, you can manually type in the specified format or click on the date in the header to quickly navigate through months or years. The clear button allows you to easily remove any entered date.

When the date entered in either of the date field lapses, a warning message is displayed. Similarly, lapsed dates are shown in red on the moduleName log.

Estimating and logging time
Task and Project Time Log
Time can be estimated and logged against individual tasks, with the total amount ...
Time can be estimated and logged against individual tasks, with the total amount of time logged or estimated being aggregated into the project. However, it is not possible to log time directly against a project. Both tasks and projects feature a Total Logged Time bar, visible in their respective popups and logs, which uses different colours to represent the following:
- If no time has been estimated, the bar will display in grey.

- If time has been estimated but no time has been logged, then the bar will display in blue.

- If time has been logged but time was not estimated, the bar will display in red.

- If time has been estimated and logged but the logged time is less than the estimated time, the bar will display in both green and blue.

- If time has been estimated and logged but the logged time is greater than the estimated time, the bar will display in both green and red.

- If the time logged is identical to the time estimated, the bar will display in green.

Individual log entries show the user who estimated or logged time, the date and time of the entry, whether the time was estimated or logged, and the total time recorded. The name of the task is also displayed in the project.
Info:
To delete a time entry (estimated or logged), navigate to the individual task and remove the details there.
This data is also displayed in the respective log and when hovering over the bar, a popup displays the estimated time, logged time, remaining time and overspent time (if applicable).

Estimating and logging cost
Cost is tracked separately for the project and for its individual tasks. Task costs are not added into the project cost total, and the project’s own cost is not added to its tasks; the projects log shows project cost and task cost as separate figures. All tasks and the project must use the same currency.
Cost tab
Costs can be estimated and logged for both a project and individual tasks. Warnin...
Costs can be estimated and logged for both a project and an individual task.
Warning:
- Any costs estimated for a task are not aggregated into the project total, and vice versa.
- Tasks associated with a project must use the same currency as the one selected for the project. When creating a project, you have the ability to select your preferred currency.
- Individual cost entries are displayed in the cost log.
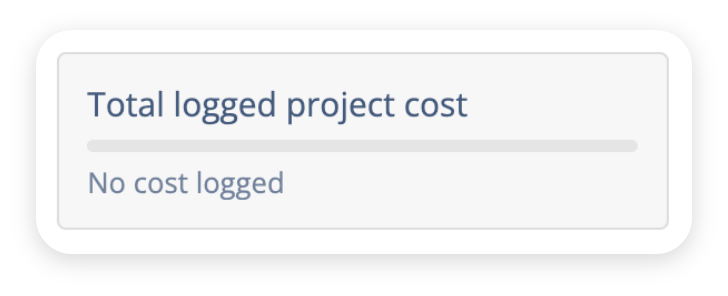
In the Project popup, for ease of use a Total logged task cost is shown on the left hand side but not included in the right hand Cost Log panel. For example, if costs have been logged against 17 of the 42 tasks associated with this project, the total cost value for the 17 tasks will be displayed.

The Cost Log allows you to view the details of the user who logged the cost, including estimated costs and the date and time of the entry. If a user modifies historic entries, you will be able to see the details of the changes made.
Similar to time, costs also displays colours using the following format:
- If no cost has been estimated, the bar will display in grey.
- If cost has been estimated but no cost has been logged, the bar will display in blue.

- If cost has been logged but cost was not estimated, the bar will display in red.

- If cost has been estimated and logged but the logged cost is less than the estimated cost, the bar will display in both green and blue.

- If cost has been estimated and logged but the logged cost is greater than the estimated cost, the bar will display in both green and red.

- If the cost logged is identical to the cost estimated, the bar will display in green.

Tip:
In the project log, two cost columns (project cost and task cost) are added for ease of reference.

Adding and managing notes
Notes Tab
The ...
The Notes tab allows you to maintain a single repository of information. You can add multiple notes at once using the Add Another function, but these notes are not saved until you click the primary Save button at the bottom of the popup.

When adding a new note, a record of the user's details, date, and time of entry are added, and the most recent notes will automatically appear at the top of the list. If an individual note is edited, the time and date of the note are updated, and the note reordered.

Additional formatting functionality is provided on the notes tab. If entering large volumes of data, click the Full Screen option.

Warning:
- For security purposes, the 9ine Platform will log users out of their active sessions after 45 minutes of inactivity, with a reminder triggered at 30 minutes of inactivity.
- If you are in full screen mode, the reminder may not appear unless you have browser-based notifications enabled.
- Typing in the field is not considered activity; activity is only registered when clicking Cancel or Save.
Uploading and managing attachments
Attachments
The ...
The Attachments tab allows you to upload files or images using your native file explorer.
- Maximum file size: 10MB
- A maximum of five files can be uploaded at a time
- Supported file types: jpg, jpeg, tif, tiff, png, odg, otg, txt, rtf, doc, docx, pages, odt, ott, odm, pdf, xml, xmlx, numbers, ods, ots, ppt, pptx, key, keynote, odp, otp, xls, xlsx, tsv, csv, pst, eml, emlx, ost, oft, msg
- The file name cannot contain special characters: /?<>|"\ #+&'~

Each attachment uploaded can be assigned a reviewer, allocated a review date, and further information can be included. This process ensures that attachments added remain current and do not become obsolete. When an attachment is added and a reviewer is assigned, the reviewer is automatically granted access to the moduleName, enabling them to review the attachment.

Understanding how to use the project log
When creating a new project or editing an existing one, the details entered are added to the log. Each project is automatically assigned a unique reference number (starting with PRO) that cannot be edited. To view only the items you are responsible for, use the My Projects function located in the top right-hand corner of the log. This will filter and display items where you are the owner, member or notified user.
Sorting, View and Filter for log
Default sorting is applied to the “No.” column, which can be altered by clicking
Default sorting is applied to the No. column, which can be altered by clicking on the title of any other column. Clicking a column header once sorts the log by the selected column, and clicking it a second time reverses the order.
To remove individual columns, click View and deselect the columns you do not want to display, whilst retaining a minimum of one column. After selecting your preferred columns, click Apply. You also have the option to Save View.

You can also change the sequence order of the columns by dragging and dropping them into your preferred order. Any changes are automatically saved and retained on the next login.

Info:
- The changes applied to the sequence order of the log and in the View popup are user and log specific and only applied to your profile.
- The sequence order in the View popup does not update to reflect the order created through dragging and dropping.
- The log opens using your most recently saved filter and column view. If you have not saved any preferences, the organisation default view is applied, this is why the log can appear differently per user account.
To focus on specific items, you can use the Filter or Search functions. When a filter is active, an orange icon appears next to the filter icon for easy recognition.
- To quickly clear any filters, click the Clear Filters button in the popup.
- You can also apply a temporary filter without clicking Save Filter.
- To revert back to your saved filter, click Reset.
- Similarly, you can select data points and click Apply without saving your filter options.

To access the risks, issues, lessons, or tasks associated with a project, click the count under the relevant column, and then select View All or the specific filtered count. For instance, clicking 6 will direct you to the Risks & Issues log, displaying a filtered view of the 6 open risks associated with the project you selected.

The Gantt Chart feature is a vital tool for project, offering a visual overview of the data within the project log. (Note that if tasks are not assigned to a project, the Gantt Chart button will appear disabled.) To access the Gantt Chart, click the button located at the top of the project log.

Once clicked, the Gantt Chart displays the project tasks colour-coded by priority and provides detailed information, including task status, start and end dates, estimated time, logged time, remaining time, and scheduled time. This feature helps project's owner and members easily track the relationships between tasks and understand the overall project flow. Where tasks do not have the required level of scheduled information, they will appear at the bottom of the Gantt Chart under the Unscheduled Tasks header. For further information refer to the Gantt Chart guide in the Help Centre.
Understanding how to use the project all log
The Project All view provides a central location for managing all records associated with a project. To access the Project All view, select the Project Title from the Project Log. The Project All view displays all child items linked to the selected project, including:
- Risks
- Issues
- Lessons
- Tasks

From this view, you can create new child items that are automatically associated with the selected project. This ensures that project-related records are maintained within the correct project structure.
Using the Project All view allows you to manage project activities, monitor progress, track risks and issues, assign tasks, and review lessons learned without navigating between multiple logs. This provides a complete view of project-related information in a single location.
Understanding the quick actions for a project
The projects log provides a range of quick-menu options, including:
-
Create Risk
This allows you to directly create a risk associated with the project. -
Create Issue
This allows you to directly create an issue associated with the project. -
Create Lesson
This allows you to directly create a lesson associated with the project. -
Create Task
This allows you to directly create a task associated with the project. -
Add a Note
Opens the project popup directly on the Notes tab. -
Add Checklist Item
Opens the project popup directly on the Checklist tab. -
Add Attachment(s)
Opens the project popup directly on the Attachments tab. -
Add Custom Data
Opens the project popup directly on the Custom Data tab. -
Add Member(s)
Opens a members popup to quickly grant users access to the project. -
Duplicate
When duplicating a project, you can choose to add a Copy of prefix to the title and its child items, or duplicate without the prefix. Attachments, notes, logged time, and costs will not be copied, and child items will not receive the prefix unless the Prefix All Items button is clicked. -
Close
Marks the project and all its associated items as closed, removing them from their respective logs. -
Reopen
Marks a closed project, opens and restores all associated items. Related tasks are returned to Not Started, while associated risks, issues, and lessons are returned to Open status. -
Delete
Marks the project and all its associated items as deleted, effectively removing them from the 9ine Platform.
Info:
When closing or deleting a project, it is not possible to retain child items such as risks, issues, lessons, or tasks unless they are moved to a different project.
Understanding default project groups and projects
Default Project Groups and Projects
A range of default project groups and projects are generated based on your organi...
A range of default project groups and projects are generated based on your organisation’s subscription. Default project groups are created to help manage your organisation's risks, issues, lessons and tasks associated with the features purchased in the 9ine Platform. They are editable by their owner, members, notified users, attachment reviewers and your 9ine Platform administrators.
There are a total of seven default project groups available across the 9ine Platform, including:
- Data Privacy & Protection
- Incident Management
- Risks & Issues
- Roles & Responsibilities
- Vendor Assessment
- Lessons
- Contract Management

These have a further seven projects (associated with their respective project group above):
- Data Privacy & Protection Governance
- Incident Governance
- Risks & Issues Governance
- Roles & Responsibilities Governance
- Vendor Governance
- Lessons Governance
- Contract Governance

Tip:
By default, a project group and their associated project share the same title. To easily differentiate between a project group and project, the word Governance is added to the end of project titles.
Default project groups and projects have a range of restrictions, including:
- These cannot be deleted but they can be hidden by using the filter.
- Your organisation is only granted access to a default project group and project based on your subscription.
- You cannot have a default project without a project group, and vice versa.
- Users can not edit the title of a default project group or project.
- A default project group or project is automatically assigned to your organisation’s Primary Account Administrator (PAA) but can be reassigned.
Tip:
To easily distinguish a default project group or project, look for the info icon in place of the Delete option.

The default project groups (and projects) created by subscription type are detailed below:
- On purchasing Privacy Platform, your organisation has access to Data Privacy & Protection, Incident Management, and Vendor Assessment.
- On purchasing Incident Platform, your organisation has access to Incident Management.
- On purchasing Vendor Platform, your organisation has access to Vendor Management.
Downloading a project and its associated risks, issues, lessons and tasks
To download a project and its associated risks, issues, lessons, and tasks, click the Download button located in the top right-hand corner of the project. You can customise the download report to include or exclude data by using the search bar, filter, view options, or My Actions function. Upon clicking the Download button, an export will be saved to your local file explorer.
The format of the exported project is XLS, with risks, issues, lessons, and tasks each displayed on separate tabs within the file.

Configuring project notification settings
Global Due Date Notifications Alerts
To ensure you're always informed of key moduleName milestones, users can configure their personal notification preferences within the Notification Settings area of the 9ine Platform. This enables both email and in-Platform alerts for important events in the moduleName lifecycle such as end dates, due dates, renewal reminders, termination deadlines, and next review dates.
To activate alerts:
- Navigate to your Notifications (available in the header)
- Click the Notification Settings icon
Toggle Global Lifecycle Alerts on for both In Platform and Email to receive notifications through both channels.

Under Reminder, you can select how far in advance you would like to be notified of an upcoming milestone (e.g. 7, 14, or 30 days before the due date). This ensures you receive early warnings before deadlines approach. You can choose any period from 1 to 31 days in advance.
These reminders are designed to give moduleName owners and stakeholders enough lead time to review, act, or make decisions before renewal or termination windows close.

To receive multiple reminders, you can enable Repeat notifications.
- Repeats are available in weekly intervals and are only triggered if your chosen reminder period is 7 days or more.
- The number of notifications is based on your reminder window:

For example:
- If your reminder is set to 10 days, you’ll receive 1 notification.
- If it’s set to 16 days, you’ll receive 2 notifications.
This flexible notification system helps ensure key events never go unnoticed, especially in busy school environments where planning ahead is essential.